Tor + Proxy Server
A frequently asked question on r/TOR is how to prevent websites from knowing that you are using Tor.
One way is to add a proxy server after the Tor network. Your traffic then emerges from the proxy server IP address instead of a Tor exit node IP address.
This tutorial walks you through the required steps.
The client in this tutorial runs Debian/Ubuntu or a similar Linux distribution. If you want to use a Windows client, you will need to install VMware Workstation Pro (now free for personal use) and run Linux in a virtual machine.
1. Find or create proxy server
For full anonymity, you would use a public proxy server. However, you may wish to create a personal proxy server for testing or educational purposes. Depending on your choice, follow either option a or option b below.
a. Public proxy server
Search the Internet for free public proxy servers using lists such as ProxyNova.
b. Personal proxy server
One difficulty in using public proxy servers is that they may be unreliable. As an alternative, you can create your own proxy server. This will not provide anonymity (since you own the final server), but it will allow you to learn the principles involved.
In this section you'll use Squid to create your HTTP proxy. The hardware requirement is a small Debian/Ubuntu virtual private server. 1 GB of RAM will be plenty.
Choose a port number other than the default (tcp/3128). We will use the example of port tcp/8888. Open port tcp/8888 in your server's firewall (some cloud providers call the firewall "security groups").
Update your server:
apt update && apt upgrade -y && apt autoremove -y
Install squid:
apt install squid -y
Back up the original Squid configuration file:
cp /etc/squid/squid.conf /etc/squid/squid.conf.old
Edit the Squid configuration file:
vi /etc/squid/squid.conf
Since traffic will arrive at Squid from any Tor exit node, add an access control list (ACL) for all possible source IP addresses. Currently the existing ACLs are around line 1333.
acl allips src 0.0.0.0/0
Allow HTTP access from all possible source IP addresses. The existing lines are around line 1536.
http_access allow allips
Around line 2108, change the listening port from the default to your choice:
#http_port 3128

http_port 8888
Save the file.
Restart Squid:
systemctl restart squid
It takes a minute or so for Squid to restart. Wait until you have a command prompt again, then check that Squid is running:
systemctl status squid
Exit your SSH session with the server:
exit
2. Test your proxy server
Whichever option you chose in the previous step, you can now test your proxy from Firefox on your PC.
Under Settings > General > Network Settings, select Manual proxy configuration. Specify your HTTP Proxy and HTTPS Proxy server address as your VPS IP address. In both cases specify the Port number that particular proxy uses. Test your web access in Firefox.
Set Firefox back to Use system proxy settings when you are done testing.
3. Install and configure Tor on client
"Tor" in this section should more correctly be called tor ("little-t tor") to distinguish the command-line service from Tor Browser.
The instructions in this section are just copied from https://support.torproject.org/apt/tor-deb-repo.
Remember that you are now working on your client, not your server.
Update your Linux client PC:
sudo apt update && sudo apt upgrade -y && sudo apt autoremove -y
Install the prerequisite package:
sudo apt install apt-transport-https -y
Create a new repository list for the Tor project repositories:
sudo vi /etc/apt/sources.list.d/tor.list
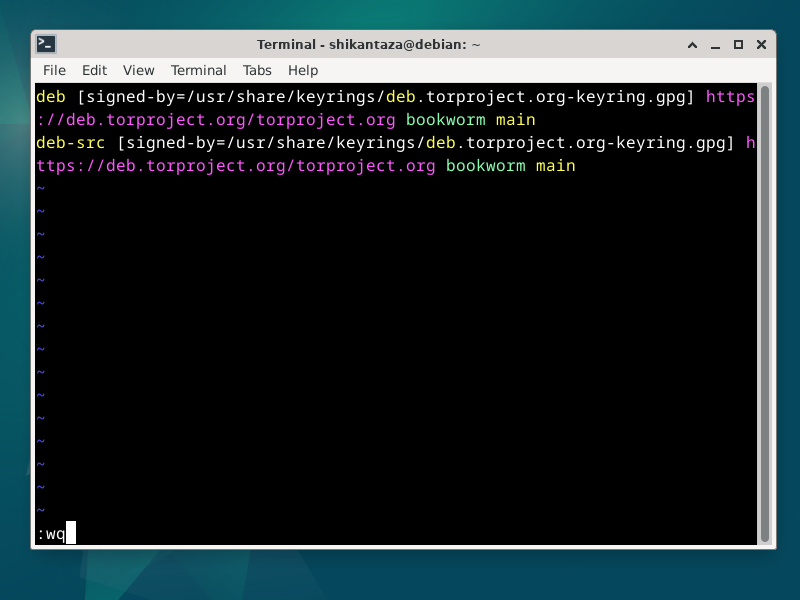
Add the following lines, replacing <DISTRIBUTION> by your distribution's code name. For example, for Debian 12 the code name would be bookworm:
deb [signed-by=/usr/share/keyrings/deb.torproject.org-keyring.gpg] https://deb.torproject.org/torproject.org <DISTRIBUTION> main

deb-src [signed-by=/usr/share/keyrings/deb.torproject.org-keyring.gpg] https://deb.torproject.org/torproject.org <DISTRIBUTION> main

Download the GPG key used to sign the Tor Project packages:
wget -qO- https://deb.torproject.org/torproject.org/A3C4F0F979CAA22CDBA8F512EE8CBC9E886DDD89.asc | gpg --dearmor | sudo tee /usr/share/keyrings/deb.torproject.org-keyring.gpg >/dev/null
Update package metadata for the new repositories:
sudo apt update
Install tor:
sudo apt install tor deb.torproject.org-keyring -y
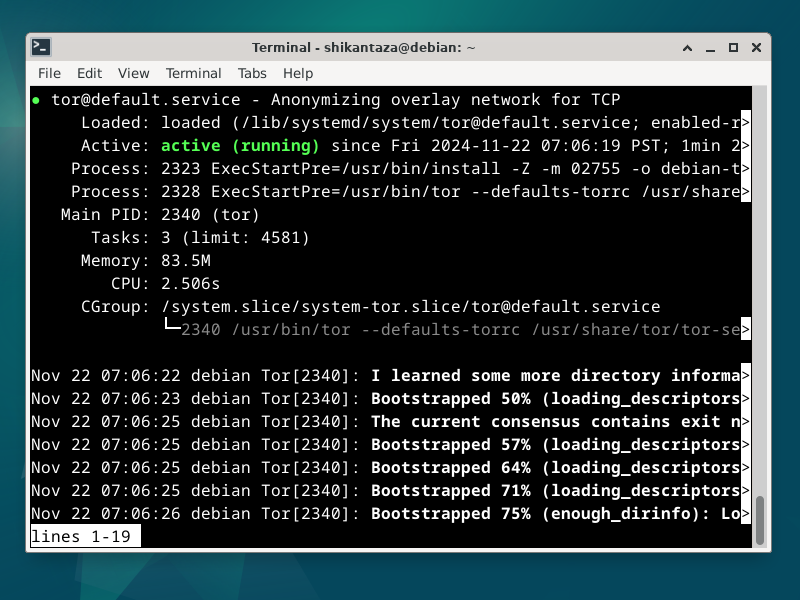
Check that the tor service is now running on your client PC:
sudo systemctl status tor@default

4. Install and configure Proxychains on client
Proxychains is a tool that forces any TCP connection made by a given application to follow through proxy-like Tor or other SOCKS4, SOCKS5, or HTTP(S) proxies. The source repository is located at https://github.com/haad/proxychains.
Install the next generation of Proxychains:
sudo apt install proxychains4 -y
If you would like more information about Proxychains, do either:
man proxychains4
or :
less /etc/proxychains4.conf
Edit the Proxychains configuration file:
sudo vi /etc/proxychains4.conf
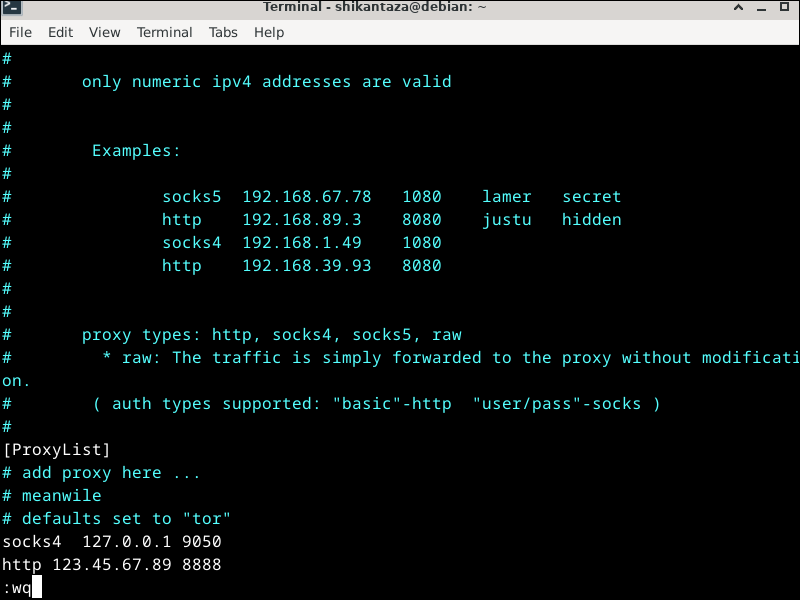
At the bottom of the file, underneath the existing line socks4 127.0.0.1 9050, add a line that looks like this. Replace the sample IP address with your actual server IP address. Replace the sample port number with your proxy server's actual port.
http 123.45.67.89 8888

Save the file.
Test Proxychains basic functionality:
sudo apt install curl -y
proxychains4 curl https://icanhazip.com
5. Replace Firefox snap with Firefox package
On some systems, installing Firefox -- even as a package -- installs the snap verion of Firefox. This creates many problems when you try to run Firefox from the command line.
Check if Firefox was installed as a snap:
snap list
If so, you must remove the Firefox snap and replace it with a package. The following instructions are copied from https://support.mozilla.org/en-US/kb/install-firefox-linux.
Determine whether firefox or firefox-esr was installed:
dpkg -l | grep firefox
Remove the existing package, which will also remove the snap if it installed the snap without asking permission. For example:
sudo apt remove firefox-esr -y
Create a directory to store the Mozilla repository signing key, if it doesn't already exist:
sudo install -d -m 0755 /etc/apt/keyrings
Download and import the Mozilla repository signing key:
wget -q https://packages.mozilla.org/apt/repo-signing-key.gpg -O- | sudo tee /etc/apt/keyrings/packages.mozilla.org.asc > /dev/null
Create the Mozilla repository sources list:
sudo vi /etc/apt/sources.list.d/mozilla.list
Add a line for the Mozilla repository:
deb [signed-by=/etc/apt/keyrings/packages.mozilla.org.asc] https://packages.mozilla.org/apt mozilla main
Configure APT to prioritize packages from the Mozilla repository:
sudo vi /etc/apt/preferences.d/mozilla
Insert lines:
Package: *
Pin: origin packages.mozilla.org
Pin-Priority: 1000
Save the file.
Update your package metadata:
sudo apt update
Install Firefox as a package:
sudo apt install firefox -y
6. Browse the web from the client through Tor + proxy server
Run Firefox under Proxychains:
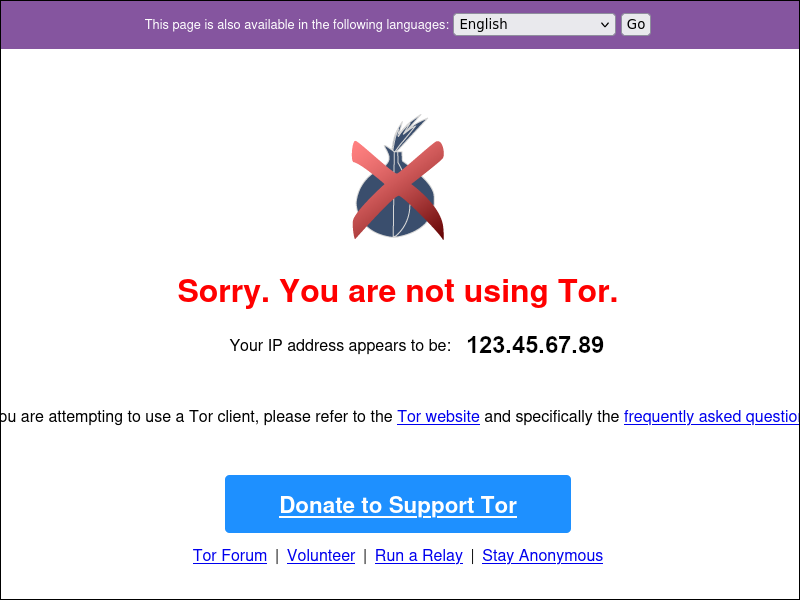
proxychains4 firefox https://check.torproject.org
Going through three Tor nodes plus a proxy server will, of course, take a while.
Make sure it appears you do not have a Tor exit node IP address.

7. Destroy proxy server VPS
If you followed option 1 b, then your personal proxy server is open to the public. To prevent random people from using it, destroy your VPS as soon as you have finished this tutorial.